Webflow SEO Basics: How to Optimise Your First Website in 2025

Key Takeaways
- SEO in Webflow is straightforward - the platform gives you built-in control over essentials like titles, meta descriptions, alt text, and clean code.
- Structure matters - use headings logically, keep URLs clean, and connect pages with internal links to help both users and search engines.
- Content is the driver - focus on publishing useful, keyword-informed content that matches what your audience is searching for.
- Performance boosts rankings - Webflow’s fast hosting helps, but you should still compress images, minify code, and check Core Web Vitals.
- Mobile and accessibility count - test your site on different devices, use readable fonts, and meet accessibility standards to improve user experience and SEO.
- Analytics is non-negotiable - integrate tools like Google Analytics or Webflow Analyze to track traffic, behavior, and opportunities for improvement.
- SEO is ongoing - monitor results, refine keywords, and keep content updated. Small, consistent updates in Webflow can compound into stronger visibility.
A pretty site won’t attract visitors. But an SEO optimized one will. Let’s make sure yours does.
In this guide, we’ll walk you through the Webflow SEO basics step by step, focusing only on the elements that actually make a difference for your website. By the end, you’ll know how to:
- Set up the essential project-level settings before you launch
- Structure headings, images, and links so search engines can read your pages properly
- Avoid common Webflow SEO issues that affect visibility
- Keep an eye on performance and Core Web Vitals without fancy paid tools
- Get your site visible and crawlable by AI search engines.
Ready? Let’s begin
Why SEO in Webflow Is (Actually) Beginner-Friendly
When people hear the term “technical SEO,” they often picture command-line tools and endless configuration files. Webflow eliminates most of that heavy lifting by shipping the key checkboxes right inside the UI, eliminating the need for plug-ins or server access. Here’s why that makes life easier for first-time optimisers:
Why this matters for beginners
- No plug-in chaos – Unlike WordPress, you won’t wonder which SEO plug-in is “the good one” or whether it’ll break after the next update. Everything lives under one roof.
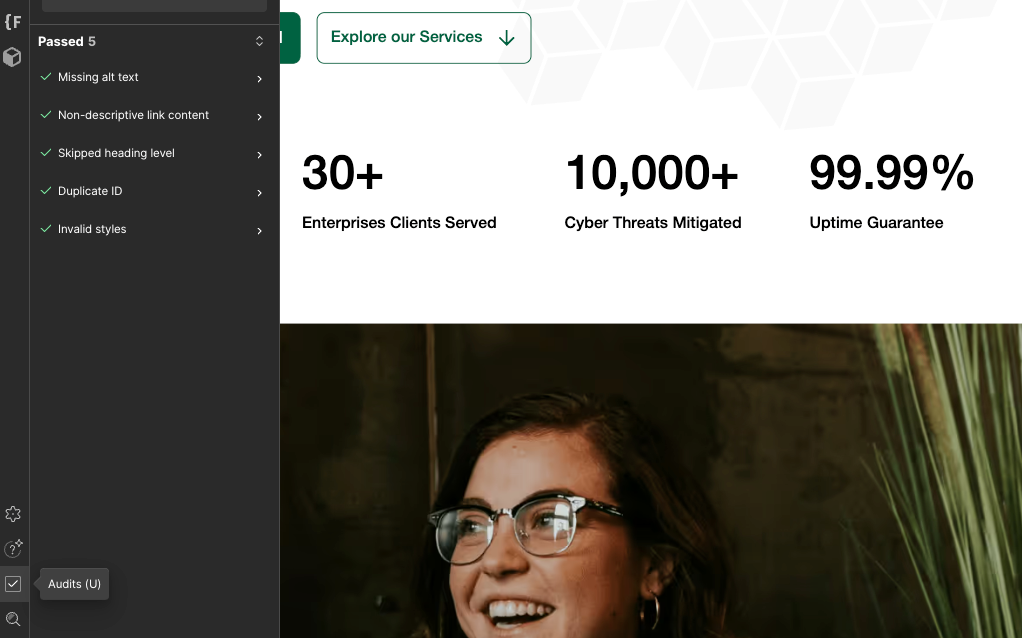
- Visual feedback helps you spot errors – The Audit panel highlights issues right on the canvas, so you fix headings and contrast in minutes instead of chasing warnings in Search Console.
- Easy Performance boosts – Toggling minification and lazy-loading images are literal checkboxes. Fast pages score higher and feel better.
- Scales with you – Need to add Spanish or German later? Enable Localization, review the auto-translated meta tags, and publish; the sitemap updates automatically.
In short, Webflow hides the complicated levers but still lets you fine-tune when you’re ready. That’s why this guide leans on the platform’s built-ins first, so you can spend less time configuring and more time creating content that earns clicks.
Pre-Launch Checks Under Webflow Project Settings
Here’s a list of things you need to make sure are configured before your first launch.
1. Site Title & Meta Description
Your title tag is the blue, clickable headline in Google; the meta description is the short teaser below it. In Webflow, you add both per-page:
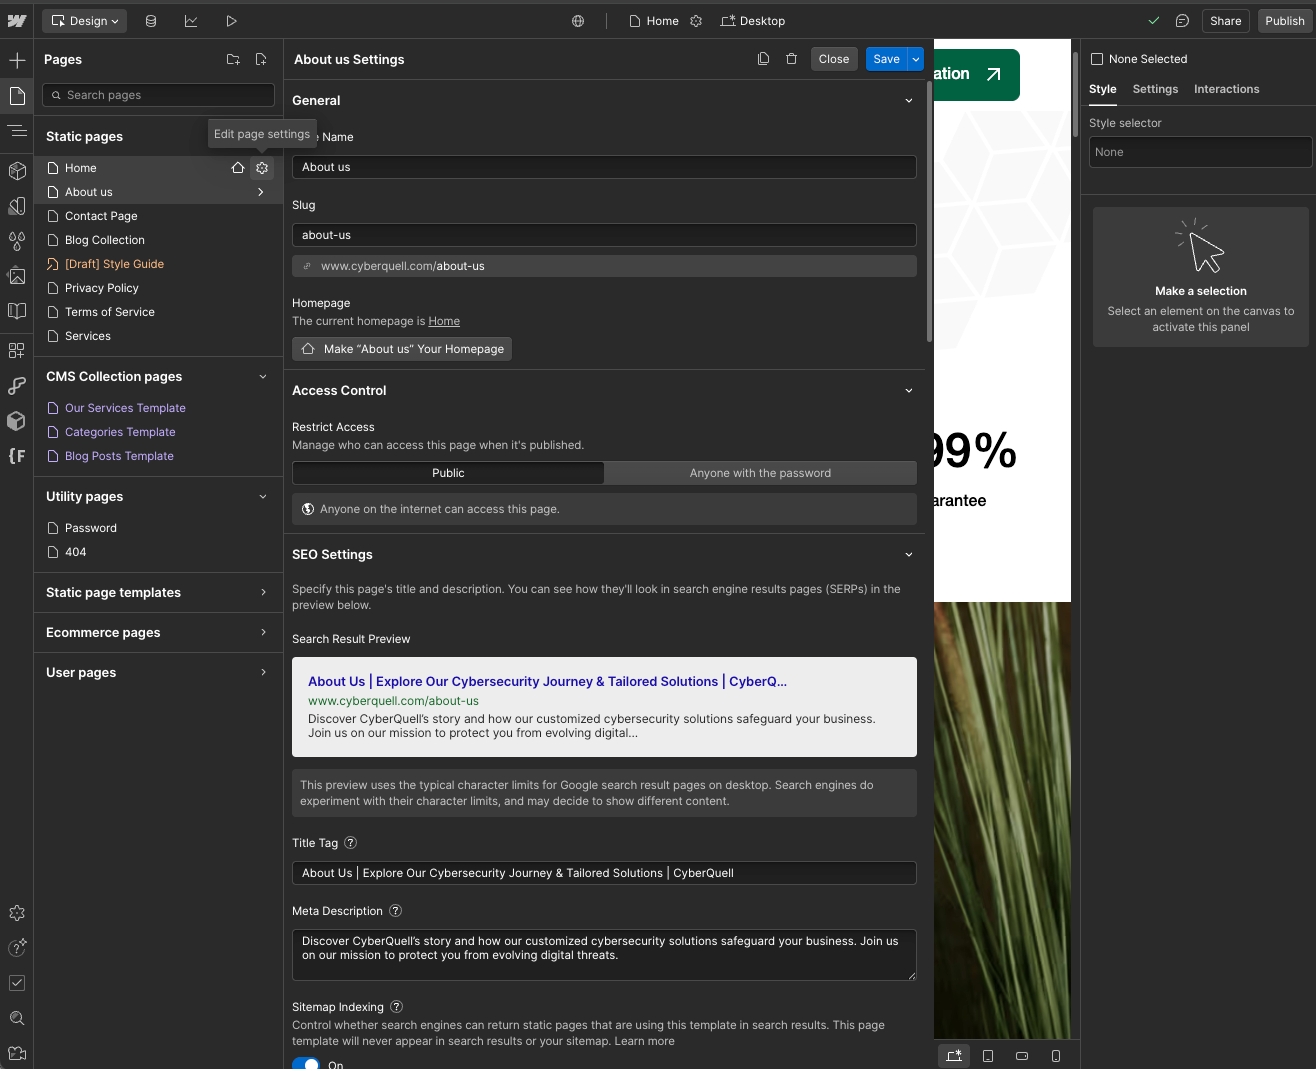
- Open the Pages panel.
- Click the cog ⚙︎ next to the page.
- Scroll to SEO settings and fill in Title (≤ 60 characters) and Meta description (aim for 150 ± 10 characters).
Quick tips
- Lead with the primary keyword, “webflow seo basics,” followed by the brand.
- Write each page’s description uniquely; duplication can hurt click-through rate.
- For CMS Collection pages, set a dynamic pattern (e.g., {{Post Title}} | {{Category}}).
2. Auto-Generated Sitemap
Webflow can build and update /sitemap.xml automatically every time you hit Publish:

- Go to Site settings → SEO → Sitemap.
- Toggle Automatic sitemap to On and click Save.
- Publish the site so the new file goes live.
A fresh sitemap helps search engines discover new pages quickly, eliminating the need for manual XML editing or additional plugins.
3. Clean, Human-Readable URLs
Search engines (and visitors) prefer short, lowercase slugs with hyphens:
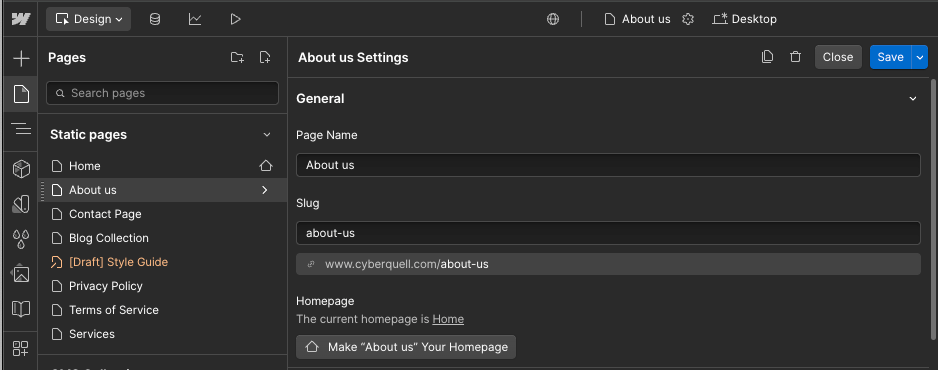
- In the Pages panel, open a page’s settings and edit the Slug field.
- Keep it descriptive but concise. (/about-us, /webflow-seo-basics, etc.)
- Stick to letters a-z and numbers 0-9; Webflow strips out capitals and special characters automatically.
Good practice
- Avoid date-stamps unless they’re essential. (/blog/2025/07/…)
- Changing a slug after launch? Add a 301 redirect in Site settings → Publishing → 301 Redirects so you don’t lose traffic.
- Nest CMS Collection slugs logically (/blog/post-title)to keep the hierarchy clear.
4. robots.txt Configuration
By default, Webflow serves a generic robots.txt that allows all bots. Customising it lets you block low-value paths and protect staging content:
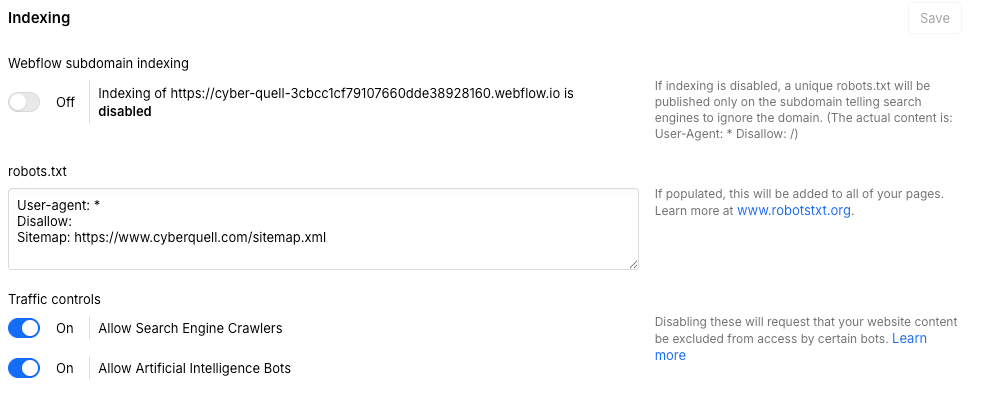
1. In Site settings → SEO → robots.txt, toggle Custom robots.txt on.
Paste rules such as:
User-agent: *
Disallow: /*?query=
Disallow: /staging-folder/
Allow: /
Sitemap: <https://yourdomain.com/sitemap.xml>
2. Save and Publish so your custom /robots.txt goes live.
Why you care: You control which crawlers can index your site, preserve crawl budget, and prevent duplicate-content issues on preview or staging URLs.
5. llms.txt for AI Crawlers
LLMs.txt is a simple, plain-text manifest that tells large-language-model bots (ChatGPT, Bard, etc.) which pages or sections you consider most valuable. Think of it as a prioritised sitemap for AI, helping ensure that the content you care about most gets picked up in AI answer boxes.
- Go to tools like SiteSpeak.ai, or Keploy.io
- Enter your site URL and the tool will generate an LLMs.txt for your website.
It will look something like this -
# llms.txt

## Core Guides
- /about
- /blog/webflow-seo-basics
- /services/seo-optimization

## API Reference
- /developers/api/auth
- /developers/api/endpoints

## Support & FAQs
- /help/faq
- /help/contact
- Once ready, go to Site Settings > SEO > LLMs.txt and upload your LLMs.txt file.

An llms.txt can help emerging AI crawlers prioritise your most valuable pages, boosting your chances of appearing in AI-driven answer boxes. Webflow talks about this and more Answer Engine Optimisation (AEO) here.
With all five items checked off, you would have locked in the core technical setup for both traditional search engines and next-gen AI crawlers.
Pro tip: Remember to periodically update your LLMs.txt file as new content is pushed on the site. Check out our article on Webflow and AI SEO to learn more about Webflow AI SEO optimisation strategy.
On-Page Optimisation Inside the Designer
Webflow’s canvas isn’t just for visuals; every click you make here also sends clues to search engines about how your content is organised and whether it’s worth showing to readers. Below are the five tweaks that provide the most significant SEO boost while you build.
1. Heading hierarchy that makes sense
Search crawlers (and screen readers) scan headings first to understand the page outline. Webflow’s Audit panel even flags “skipped heading levels,” so you’ll know instantly if you jump from an H1 to an H3.
Here’s how to go about it:
- Select a text block and choose H1 – H6 in the Settings bar.
- Use only one H1 per page (usually the title), then nest H2s within H3s, as you would in an outline.
- Open the Audit panel (Check box icon, bottom-left). If “Skipped heading level” appears, adjust the offending heading until the warning disappears.
2. Alt text + smart image sizing
Alt text describes an image for visually impaired users and serves as topical reinforcement for search engines like Google. Adding it takes seconds:
- Press J to open the Assets panel.
- Hover an image > click the cog ⚙︎ > fill in the Descriptive alt text field.

Webflow also generates responsive versions of large images and applies light compression on publish. Still, aim to resize & compress before upload; you’ll keep Core Web Vitals happy and avoid the heavier automatic compression that can blur details.
3. Internal linking with CMS Collections
Links that connect related pages help search engines crawl deeper (and keep readers exploring). In Webflow, a dynamic Collection List handles this for every blog post or product:
- Drop a Collection List on the page.
- Inside the list, add a Link Block → Settings → choose Collection Page → Current item. Now, each card automatically points to its own detail page.
- Webflow applies a consistent design style to all items, ensuring uniformity throughout.

Pro tip: Add a second list filtered to show “Related posts” (same category tag) at the bottom of each article.
4. Accessibility wins that boost SEO
Accessibility is as important for the SEO as it is for users with disability. Webflow offers several built-in accessibility tools to help you make your site more accessible and improve SEO. Here’s what they are -
a. Colour-contrast checker
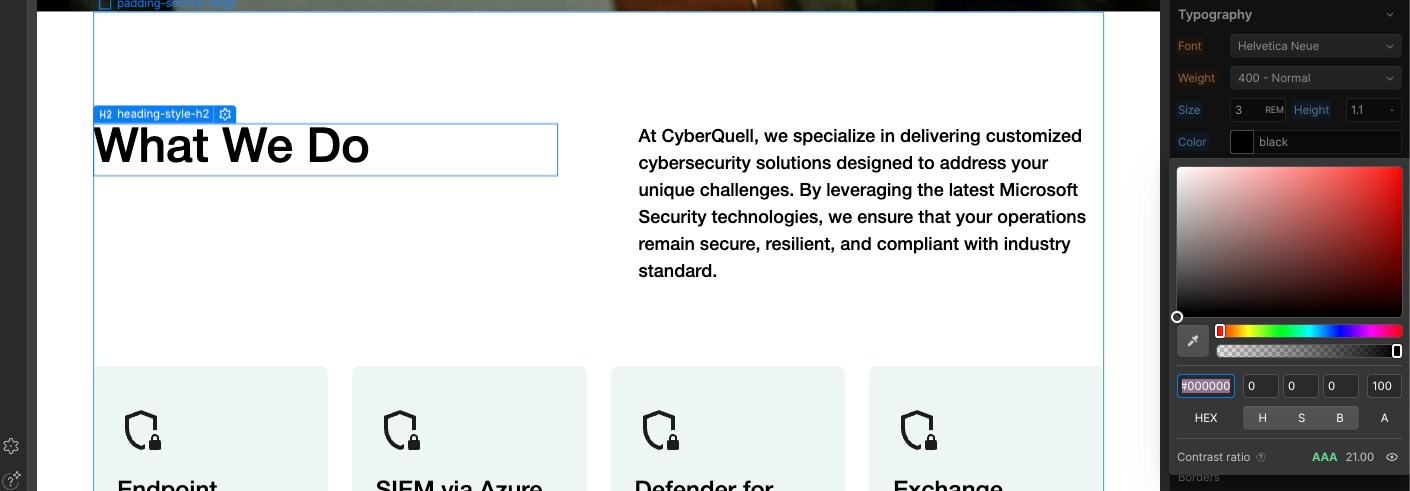
Poor contrast can hurt readability and as a result, reduce scroll time as well. Select any text, open the Colour picker, and look for the contrast badge (AA/AAA or Fail). Adjust until you hit AA or better.
b. ARIA labels for interactive elements
In the Element settings panel, use the Attributes section to add aria-label="Main navigation" or similar to nav wrappers, buttons, and icons. Clear labelling helps screen readers and Google’s accessibility signals understand what each element does.
5. Plug-and-play schema markup (Article & FAQ)
Structured data tells Google exactly what your page is (an article, recipe, FAQ, etc.), unlocking rich results and improving AI Overview visibility.
Here’s how to set it up:
- Copy the JSON-LD block below (swap in your details).
- Open Page settings → Custom code → Head and paste it.
- For CMS templates, use a Dynamic Embed so fields (title, author, date) fill automatically.
<script type="application/ld+json">
{
  "@context": "<https://schema.org>",
  "@type": "Article",
  "headline": "Webflow SEO Basics: How to Optimize Your First Website",
  "datePublished": "2025-07-21",
  "author": { "@type": "Person", "name": "Corbinian" },
  "mainEntityOfPage": { "@type": "WebPage", "@id": "<https://yourdomain.com/blog/webflow-seo-basics>" }
}
</script>
Setting these things right helps your site speak the same clear language to both humans and search bots.
5 Common Webflow SEO Misses (And how to fix them)
Even if you’ve set up the basics, a handful of overlooked Webflow settings can quietly tank your SEO. Check for these five before you launch.
Quick sanity check
- Publish to staging first → run through the table.
- Flick to your custom domain, publish again.
- Open Audit panel → confirm no red flags.
- Grab a coffee, your launch is now free of the sneaky technical traps that most beginners miss.
Performance & Core Web Vitals Tweaks
Google’s Core Web Vitals (CWV) roll real-world speed and stability into their ranking system, so polishing these numbers is pure SEO. The happy news: Webflow hides most of the hard work behind a handful of switches and smart defaults. Tackle the items below and you’ll be well inside Google’s “good” thresholds for LCP < 2.5 s | INP < 200 ms | CLS < 0.10.
Quick step-by-step
- Flip all three Minify checkboxes → Publish to staging → re-publish to live.
- Re-export big images as WebP (or let Webflow’s responsive image tool do it) and replace any >250 KB originals.
- Select each custom font → set display = swap.
- Add width/height or aspect-ratio to every media element above the fold.
- Scan with Audit panel for layout-shift warnings and unminified assets.
- Re-test in PageSpeed Insights. Aim for green LCP/INP/CLS bars; adjust and re-test until you achieve them.
Implementing these six tweaks typically elevates a brand-new Webflow site to a score of 90+ PSI, providing sufficient room for both users and Google’s CWV algorithm to be satisfied.
Optimizing for AI Overviews & Large-Language-Model Search in 2025
Google’s AI Overviews and ChatGPT-style assistants now answer many beginner queries before the classic blue links. If you want your brand-new Webflow page to be cited inside those answer boxes, you need to serve content that’s clear, well-structured, and machine-readable. Google’s guidance boils down to three pillars: unique, people-first content; a great page experience; and clean, structured data . Here’s how to apply that advice inside Webflow.
1. Write for people, structure for machines
Your writing should sound natural and helpful, but also be easy for AI to break down. Use short paragraphs, clear headings, and bullet lists. Answer common questions in a Q&A style so they’re ready-made for snippets. Add examples and simple definitions. AI loves content that explains without overcomplicating things.
2. Give visitors (and AI) a smooth page experience
Page speed and usability matter just as much to AI search as they do to humans. In Webflow, use built-in image compression, lazy-loading, and clean layouts to keep things quick. Make sure your design adapts well on mobile, headings are in the right order, and colors pass Webflow’s built-in contrast check.
3. Add structured data so AI knows what it’s looking at
Schema markup tells search engines exactly what’s on your page. If you’re answering questions, add FAQ schema. Writing a guide? Use HowTo schema. Publishing a blog post? Add Article schema. In Webflow, you can paste JSON-LD into the Page Settings → Custom Code field.
4. Cover the topic fully, without fluff
If someone asks “How do I add alt text in Webflow?” explain it clearly, step-by-step, on one page. Include related terms and common follow-up questions so your content has enough depth for AI to pull from. The goal is to make your page the one-stop answer.
5. Use precise, entity-rich language
AI tools work best when they understand exactly what you’re talking about. Use the correct names of features, tools, and concepts (“Webflow CMS”, “301 redirects in Webflow”) and link out to credible sources when needed.
6. Keep it fresh
AI search prioritizes current information. Update your pages when Webflow changes its features or SEO best practices shift. Adding a “last updated” date helps show both search engines and users that the content is still relevant.
Wrapping It Up
Optimizing a Webflow site for SEO isn’t about cramming in keywords or chasing algorithms. It’s about making your content easy to find, understand, and trust. From setting up the right meta tags to structuring your headings, from improving page speed to adding schema, each step builds a site that works for both people and search engines (including the AI-powered ones).
Start small: get your technical basics in place, then focus on creating genuinely useful content for your audience. Keep your site fast, accessible, and up to date. The combination of solid fundamentals and a people-first approach will help your Webflow site show up in more searches, answer more questions, and earn more clicks over time.
The sooner you start, the sooner you’ll see results, so open up your Webflow dashboard and put these tips into practice today.
FAQ
Yes. Webflow lets you set meta titles, descriptions, alt text, canonical tags, and generate sitemaps right from the Designer or Page Settings. It also offers control over heading structure, redirects, and open graph settings without the need for plugins.
Start with solid on-page SEO: write clear, useful content, add meta titles and descriptions, use headings properly, and include alt text for images. Then, make sure your site loads fast, is mobile-friendly, and has clean URLs. Link to it from credible sources to build authority.
Yes. You can paste JSON-LD schema directly into a page’s Custom Code section or your site’s global Custom Code area in Project Settings. This helps search engines and AI assistants better understand your content.
Definitely. Webflow handles a lot of the technical SEO automatically, so beginners can focus on writing great content and structuring pages well. Plus, its visual editor makes it easier to manage SEO settings without touching code.
It depends. Small updates can be reflected in search results within days, but big ranking improvements usually take weeks or months. Factors like competition, content quality, and backlinks all play a role.
Not always. Most SEO tasks can be handled inside Webflow without coding. For advanced needs like complex schema, custom sitemaps, or integrating SEO APIs, you might want a developer’s help.